Help & guides
Everything you need to set up your page, manage bookings, and make the most of Buuked.
Getting started
Set up your page and start taking bookings.
How to set up your Buuked page
Setting up takes about 5 minutes. Here's what happens:
- Sign up with your email at buuked.me/signup
- Add your details including your business name, first name, bio, and profile photo
- Add your services with prices and durations
- Choose a theme and pick a plan (Free or Pro)
- Publish and your page goes live
After publishing, your dashboard will show a checklist of things to complete before sharing your link, like setting your availability, policies, and payment terms.
How to set your availability and time between clients
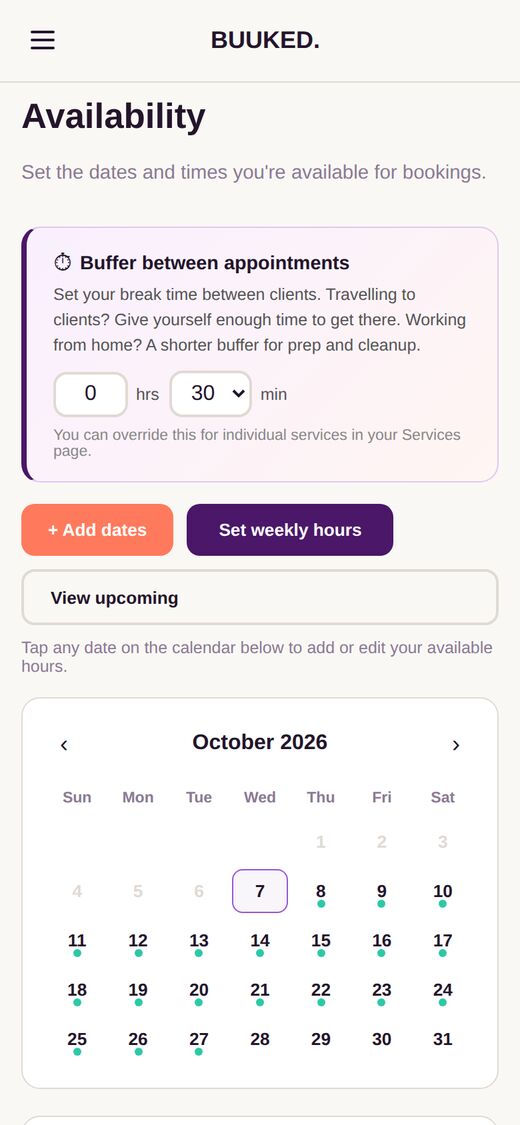
Clients can only book slots you've added. Go to Availability in your dashboard.
- Tap a date on the calendar and add your working hours (e.g. 9:00 AM to 5:00 PM)
- Or use Set weekly hours to add the same hours across multiple weeks at once
- Set your time between clients at the top of the page. This is the time after each appointment for tidying up, a break or travel
How to add services, categories, and add-ons
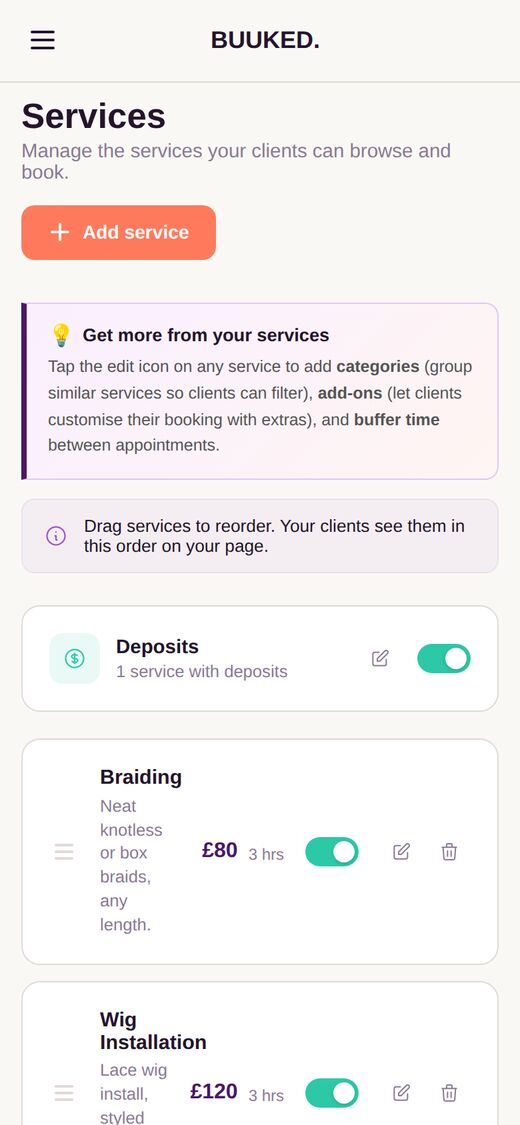
Go to Services in your dashboard and tap Add service.
- Enter the service name, price, and duration
- Choose a category to group similar services (e.g. "Nails", "Hair", "Portraits"). Clients can filter by category on your page
- Add add-ons so clients can customise their booking with extras (e.g. "Nail art +£10", "Extra photos +£25")
- Set a different time between clients if this service needs more or less time after it
How to set your policies and payment terms
Go to Settings > Booking rules in your dashboard.
- Minimum notice sets how far in advance clients must book (e.g. 2 hours, 24 hours)
- Cancellation window is how late they can cancel without penalty
- Write your cancellation policy, lateness policy, and house rules in your own words
For deposits, go to Services and toggle on the Deposits switch. You can set a fixed amount, a percentage, or require full payment upfront for each service.
How to customise your theme and page layout
Go to Settings > Page design in your dashboard.
- Pick a theme from 3 free themes (Classic, Noir, Fresh) or 12 with Pro
- Choose your page layout (Banner or Card)
- Upload a cover photo for the hero banner at the top of your page
- Use Section order to drag and rearrange your page sections (Services, Portfolio, Reviews, Policies, Contact)
Payments and your link
Get paid and get your link out there.
How to take deposits and payments
Go to Payments in your dashboard.
- Choose where your business is based: United Kingdom for deposits in £, or United States for deposits in $
- Tap Connect with Stripe. Setup takes about 5 minutes, and Stripe will ask for your ID and bank details
- Go to Services, turn on the Deposits switch, and set a fixed amount, a percentage or full payment for each service
- Under Other ways to get paid, add your bank details, PayPal, Cash App, Venmo, Zelle or Revolut, then tap Save payment methods
How to get your branded link Pro
On Pro, you can have a link like yourname.buuked.me.
- Go to Settings > Profile
- Under Your page link, type the name you want in Custom subdomain
- Check it says it's available, then tap Save changes
Your buuked.me/yourname link keeps working too, so old links and QR codes still work.
For your clients
How things work from the client's side.
How booking works for clients
When a client visits your Buuked page:
- They browse your services and pick one (or more)
- They choose a date and time from your available slots
- They enter their name, email, and phone number
- They confirm the booking
Both you and the client get a confirmation email. On Pro, the client also gets an appointment reminder by email the evening before. After the appointment, they can be asked to leave a review (Pro feature).
How clients cancel or reschedule
Clients receive an email with their booking confirmation that includes a link to manage their booking. From there they can:
- Cancel the booking (subject to your cancellation policy)
- Reschedule to a different date or time within your available slots, if you've turned on Allow clients to reschedule in Settings > Booking rules (Pro)
You'll get an email notification whenever a client reschedules or cancels.
How reviews work Pro
Reviews are a Pro feature. When you mark a booking as complete in your dashboard, the client automatically receives an email asking them to leave a review.
Only clients who have actually booked with you can leave a review. Reviews show on your public page and help build trust with new clients.
To turn on reviews, go to Settings > Page design and toggle Reviews on.
Managing your page
Day-to-day features and settings.
How to add or import your clients Pro
Go to Clients in your dashboard. Everyone who books through your page is added automatically.
- Tap Add a client to add someone by hand, with their phone, email and notes
- Or tap Import clients and choose a CSV or Excel file of your clients, for example one downloaded from Fresha, Booksy or Square
- Check the columns Buuked matched, then tap Import. Anyone already on your list is skipped
Importing doesn't send your clients anything. How to get your client list from your old app
How to change your username or profile details
Go to Settings > Profile to update your business name, bio, avatar, location, address, and social links.
You can also change your username here. Note: this changes your buuked.me link, so any old links or QR codes will stop working. A branded link (yourname.buuked.me) on Pro isn't affected.
How to use holiday mode Pro
Going away? Holiday mode pauses new bookings while you're away.
- Go to Settings > Page design
- Turn on Holiday mode and add the dates you're away
- Your page shows an away message, and new bookings pause until you switch it off
How to see your earnings and analytics
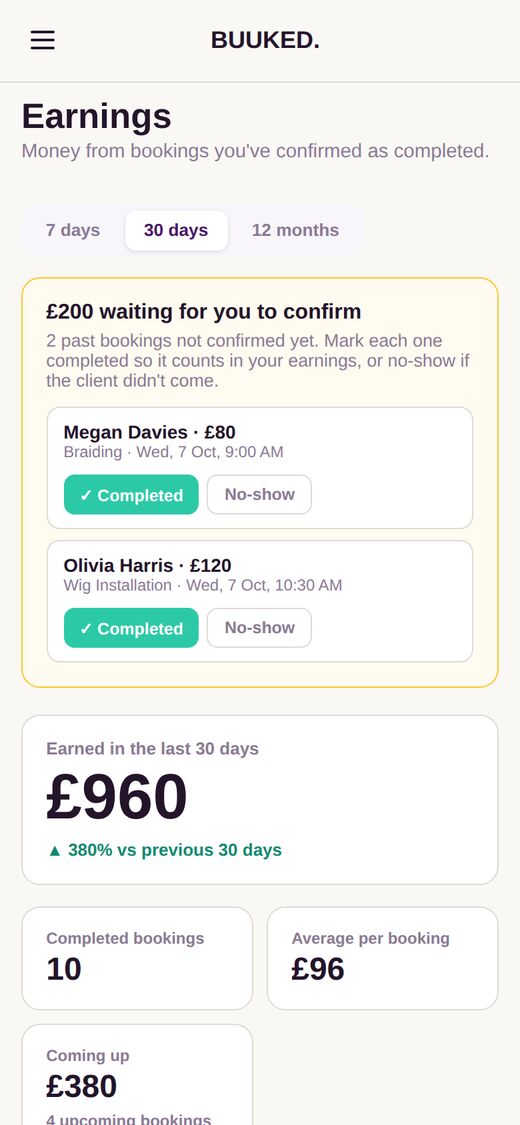
Go to Earnings in your dashboard to see what you've made.
- See what you've earned in the last 30 days, your completed bookings, your average per booking, and what's coming up
- Mark past bookings as Completed or No show so your earnings stay accurate
- On Pro, Analytics shows how many people visit your page and where they come from, like Instagram or TikTok
How to upgrade to Pro
Go to Subscription in your dashboard menu.
- Choose Monthly or Yearly (yearly saves you 10%)
- Tap Subscribe to Pro and pay securely with Stripe
- Pro switches on as soon as your payment goes through
Pro costs £7.99/month (or $9.99/month outside the UK) and includes:
- All 12 themes (including dark themes)
- Unlimited bookings (no 3/month cap)
- Unlimited portfolio photos
- Client reviews on your page
- Client rescheduling (clients can change their booking time)
- Holiday mode
- A branded link like yourname.buuked.me
- No Buuked branding
- Priority support
Cancel anytime. No contracts.
Free vs Pro: what you get
Free gives you everything you need to get started: your own booking page, 3 themes, unlimited services with add-ons, up to 6 portfolio photos, and 3 bookings per month.
Pro (£7.99/mo) removes all limits and adds features that help you grow: unlimited bookings, all themes, verified reviews, client rescheduling, holiday mode, a branded link, no branding, and priority support.
Many freelancers start on Free and upgrade once bookings pick up.
Still stuck?
Send us a message and we'll get back to you.
Ready to get started?
Create your booking page in 5 minutes. Free to start, upgrade anytime.
Create your booking page